How it Works
Our technicians here at djidroneservice.com are DJI certified, meaning that they know everything there is to know regarding DJI drone repair. As long as the nature of the damage to your drone is possible to repair, we at djidroneservice.com will happily fix your drone. Whether you have a Mavic, Phantom, or any other type of DJI drone, djidroneservice.com is the place to go for convenient and inexpensive drone repair.
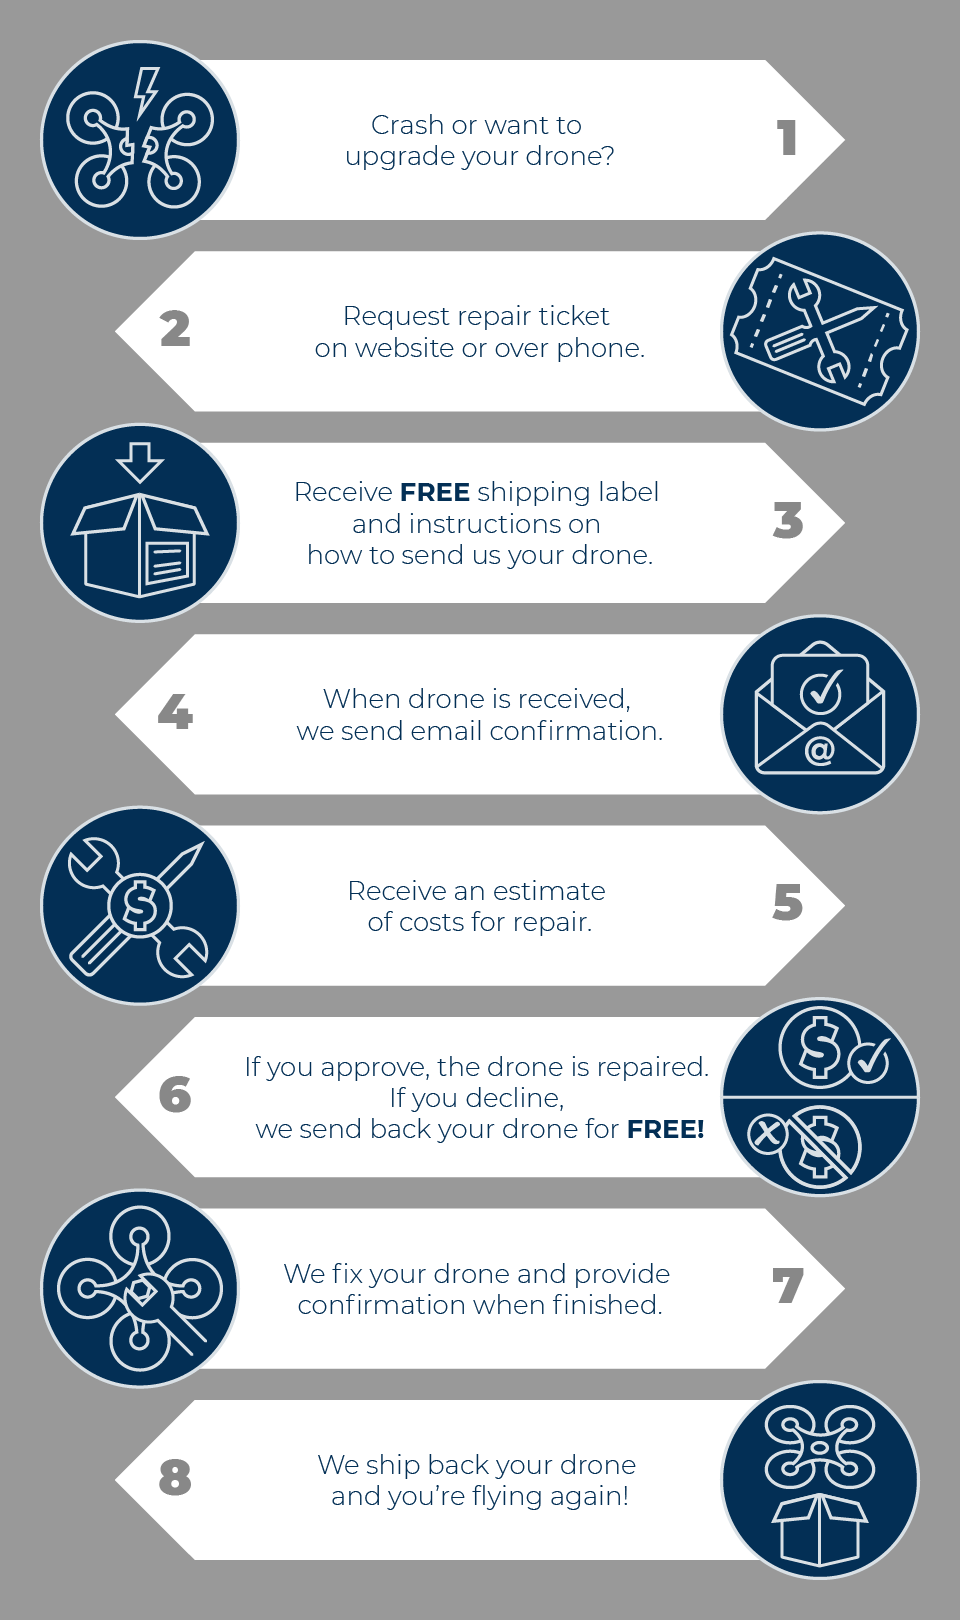
You are not risking any money by sending your damaged drone for inspection, because you only pay if we fix your drone. Djidroneservice.com does not charge inspection fees and shipping is always free. This is our policy even if you do not choose to purchase our repair services. Consider shipping your drone to djidroneservice.com for inspection and repair before you accept the lengthy and expensive repair process you can expect elsewhere.
Congratulations, you have rooted your MTK device using the updated v255 method.
However, the process is not without peril. Utilizing unofficial tools like v255 carries several risks: Security Vulnerabilities
: Rooting breaks the "sandbox" security model of Android, making the device more susceptible to malware. Warranty Voidance
Click , connect your powered-off device while holding the required volume keys, and wait for the "Success" confirmation popup. mtk root v255 updated
Before attempting to use MTK Root v255, you must prepare your environment and device. Skipping these steps can permanently damage (brick) your phone. 1. Backup Your Data
: The latest stable update (as of March 2025) for obtaining "bootless" root access on MediaTek processors.
Boot into your recovery menu (usually Volume Up + Power) and execute a Wipe Data/Factory Reset . If it continues to loop, flash your original, unpatched boot.img back using v255 to restore functionality. 3. "DA Auth Error" or "Secure Boot Enabled" Congratulations, you have rooted your MTK device using
Reboot your device. Open the Magisk app to confirm superuser status. Troubleshooting Common Errors Device Not Detected (Waiting for USB Device)
Go to Settings > About Phone and tap Build Number seven times.
If prompted, select the specific Magisk version patch integrated into the interface. Warranty Voidance Click , connect your powered-off device
Turn off your phone and boot into Fastboot/Bootloader mode (usually by holding Volume Down + Power). Connect it to your PC.
Connect your powered-on Android device via USB cable to the PC. Wait for the tool to detect the chipset and device model. 3. Root Process Select the option within the interface.