ONIE Recovery on x86-enabled Netberg Aurora switches

This page describes how to install the ONIE boot loader on Netberg Aurora switches.

1. Download the recovery image suitable for your switch or build one from GitHub.

Intel Tofino-based switches:

Aurora 610 recovery image

Aurora 710 recovery image

Aurora 750 recovery image

Aurora 810 recovery image

Innovium-based switches:

Aurora 615 recovery image

Aurora 715 recovery image

Broadcom-based switches:

Aurora 221 recovery image

Aurora 621 recovery image

Aurora 721 recovery image

Aurora 820 recovery image

Aurora 830 recovery image

Aurora 420/620/630/720 recovery image for OpenSwitch and ICOS

Aurora 420/620/630/720 recovery image for Open Networking Linux

2. Copy ONIE recovery to a USB thumb device.

Use “dd” command to copy the .iso image to a USB stick:

dd if=onie-recovery-x86_64-netberg_rangeley_p1330-r0.iso of=/dev/sdb bs=10M

3. Connect a USB thumb device to the front panel USB port.

4. Connect to the switch via serial console using standard settings:
ps4 goldhen tutorial

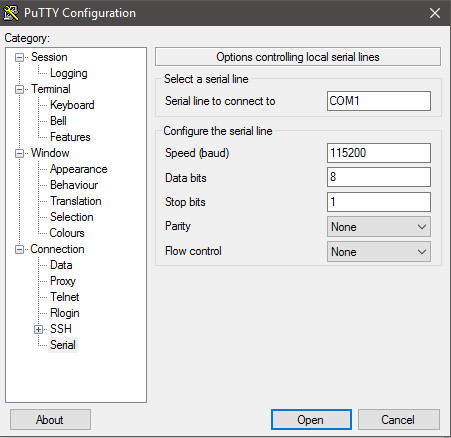
WARNING: Do not use a USB-mini USB cable, it will damage the console port on the switch.

Use the enclosed serial cable.

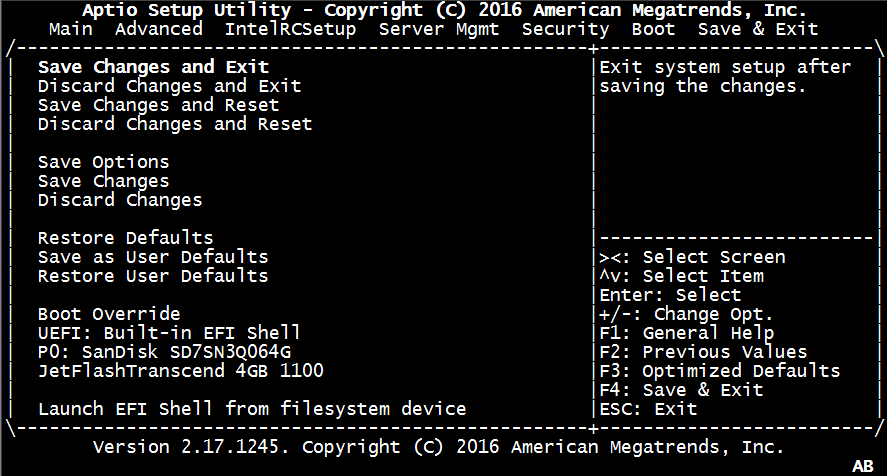
5. Power on the switch and press <ESC> until entering BIOS.

Go to the “Save & Exit” tab and boot to the USB drive using “Boot override” section.

aurora_bios

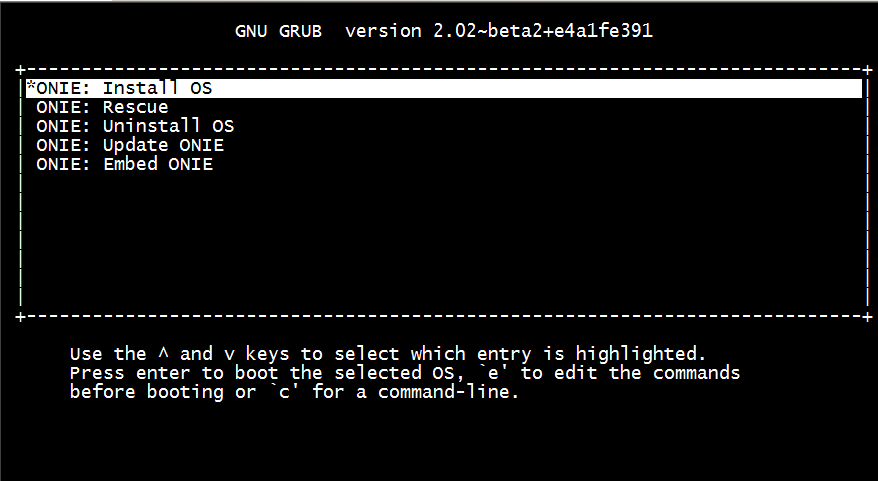
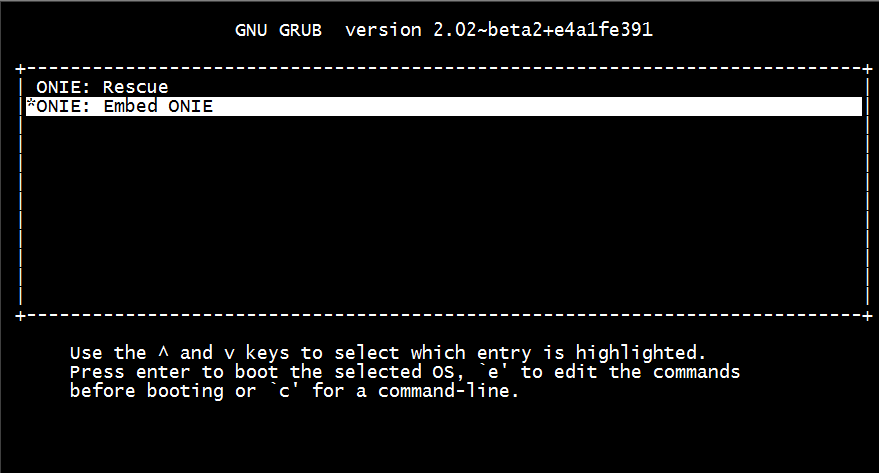
6. Embed ONIE to the switch.

embed_onie

7. ONIE is ready after reboot. (Please remove the USB stick)

onie_boot

Ps4 Goldhen Tutorial Online

Open the web browser and go to a trusted, cached exploit site (e.g., pkg-zone.com or similar).

Select the firmware version matching your console (e.g., ).

Download the GoldHEN.bin stage2 payload compiled specifically for firmware 11.00. Place it in the designated folder within your PPPwn software directory on the PC.

GoldHEN will inject, and you will see a success notification in the top-left corner of your screen. You can now remove the USB drive. Part 2: How to Install GoldHEN on Firmware 11.00 (PPPwn) The 11.00 exploit utilizes a PPPoE network vulnerability. Step 1: Prepare Your PC ps4 goldhen tutorial

Wait for a pop-up that says: "Insert USB now. Do not close this dialog until the notification appears." Plug your "Magic" USB into the PS4.

Wait for the system notification: "This USB storage device's file system is unsupported."

Open the on your PS4 or go to Settings > User’s Guide . Open the web browser and go to a

For more information on the PS4 Goldhen tutorial, including updates and troubleshooting guides, visit the following resources:

Open the under Settings, or open the PS4 Web Browser and type in a hosted exploit URL (like kameleonreloaded.github.io or nightkinghost.com ). Select the 9.00 firmware option on the screen. Click on GoldHEN .

Once GoldHEN is successfully loaded, the following features become available: Place it in the designated folder within your

On the PS4, go to > Network > Set Up Internet Connection > Use a LAN Cable > Custom > PPPoE . Enter anything for the username and password.

Navigate to > Network > Set Up Internet Connection . Select either Wi-Fi or LAN Cable , then choose Custom . Keep IP Address settings on Automatic . Set DHCP Host Name to Do Not Use . Set DNS Settings to Manual .

Click . The script on your PC will take over, exploit the console, load the binary file from your USB drive, and launch GoldHEN. How to Use GoldHEN Features